Thursday, December 8, 2011

Upcoming Class Schedule

This winter/spring I will be teaching some classes through the RSU 24 Adult Education.  I have listed them below.  They will all be held at my studio, located at 130 Oak Street, Suite One (bottom floor), Ellsworth, Maine.  To register, you can visit http://rsu24.maineadulted.org.  Feel free to email me with any questions at info@willowandme.com.


COPPER CLAY

Mondays, January 23 and 30 and February 6 and 13, 5:30 to 8:30 p.m.

With the rising cost of silver, many people are turning to alternative metals to make jewelry. In this class we will explore copper clay using Metal Clay Adventures' COPPRClay and Art Clay Copper. This class will be suitable for beginners or for those who have used other metal clays and would like to try copper clay. We will discuss the differences between the brands of copper clay as well as how they differ from other metal clays. We will learn techniques for making several pieces of jewelry. The instructor will have tools available for use in class and tool kits are available for purchase ($40). A supplies fee of $50 will be payable to the instructor on the first class, which will include a 50 gram packages of each kind of clay and other necessary supplies.

Metal clays are mediums in which metal is suspended in an organic binder which can be worked much like modeling clay. It can be shaped and molded. When fired at a high temperature the binder burns off, leaving a pure metal piece. Metal clays come in many varieties including silver, bronze and copper.


 PMC FOR BEGINNERS

Saturday, March 24, 2012, 9:00 to 3:30
Bring a bag lunch (a refrigerator and microwave are available)

Learn to make your own fine silver jewelry with Precious Metal Clay. PMC is a clay with fine silver particles in an organic binder that can be worked much like any other clay, and when fired at a high temperature, the binder burns away, leaving a pure silver piece. Students will work the clay in all forms, from wet clay through the firing process. Many techniques will be covered, with plenty of time for experimentation and questions. At the end of the course, you will have, at a minimum a finished necklace and pair of earrings, as well as the skills and knowledge to work with PMC on your own. A tool kit and supplies will be available for purchase from the instructor. The cost for the tool kit, which includes everything you will need to work with PMC, a 16 gram package of PMC, and the findings to finish a necklace and a pair of earrings is $75.00. Additional PMC will be available for purchase.


BRONZE CLAY
Mondays,  April 23 and 30 and May 7 and 14, 5:30 to 8:30 p.m.

With the rising cost of silver, many people are turning to alternative metals to make jewelry. In this class we will explore bronze clay using Metal Clay Adventures' Fast Fire BronzClay. This class will be suitable for beginners or for those who have used other metal clays and would like to try bronze clay. We will discuss the differences between bronze clay and other metal clays and learn techniques for making several pieces of jewelry. The instructor will have tools available for use in class and tool kits are available for purchase ($40). A supplies fee of $40 will be payable to the instructor on the first class, which will include a 100 gram package of Fast Fire BronzClay and other necessary supplies.

Metal clays are mediums in which metal is suspended in an organic binder which can be worked much like modeling clay. It can be shaped and molded. When fired at a high temperature the binder burns off, leaving a pure metal piece. Metal clays come in many varieties including silver, bronze and copper.


OPEN STUDIOS:  For those accustomed to coming in for Open Studios on Monday nights, on weeks that there are classes, Open Studios will be held on Tuesdays from 4:30 to 8:30.  Non-class weeks will have Open Studios on Mondays as usual.

Tuesday, October 4, 2011

New Classes for Fall are Up!


Now that it's October (I still can't believe time is going so fast!), I have finalized my list of classes for the rest of the year.  For those of you who have taken my classes before, you will be familiar with the format, for everyone else:  I have mixed level classes every Monday night from 5:30 to 8:30, each evening with a different subject relating to metal clay.  Students are welcome to come into the studio any time after 4:00 to work independently until the class starts. Others who wish to work on their own but do not wish to participate in the class are also welcome.  One thing that is different is that each class is priced separately, depending on the subject matter.  Some classes go more than one week.

I have had a lot of requests for bronze and copper clay classes, since the price of silver keeps rising, so my first two classes will be quick "tastes" of bronze and copper clay.  Because of the nature of firing these clays, classes must be split into two evenings.  This class will be appropriate for those who have used silver clay before and want to try the bronze and copper clays, as well as for those who have never used clay before.

I will also have classes on making your own textures with some new techniques I learned when I was at Haystack as well as hollow forms and one evening dedicated to working with dry clay in which I will have lots of tips, tricks and demonstrations, including how to reconstitute clay.  This is a great thing to know if you tend to accumulate a lot of shavings and leftovers.

Two Saturday workshops are also scheduled.  They are geared towards beginners but any levels are welcome to participate.

I have worked hard to make it easy for you to register for classes.  You can register right through my website and pay with PayPal or credit card or reserve a space and indicate you will be paying by cash or check.  One thing to note is that deadline for registration for a class is one week prior to the beginning of class to be sure we have enough supplies for everyone.

You can see full descriptions of these classes as well as register at www.willowandme.com/register.  Each is also on my calendar, which you can find at www.willowand.com/showschedule.  I will also be adding these as events to my Facebook Page, which you can check often for updates.  That will be the best place to check for cancellations as well.  I am very excited about these classes.  I hope to see you there.


Monday, September 12, 2011

Sterling Silver Clay

One of the things I have been dying to try ever since the article came out in Metal Clay Artist Magazine is Lisa Cain's recipe for sterling silver clay.  But I didn't have any PMC Pro and I didn't have an extruder.

Then I went to Haystack and met Lisa and she talked about the sterling silver clay, which, again, made me want to try it.  I did have the PMC Pro, as it was one of the suggested items for the Haystack class, but still no extruder.

Ever the problem solver, I remembered a comment Lisa made during her discussion saying it was too bad there wasn't a mini bread kneader machine we could use instead of the extruder.  Then a light bulb went off!  Of course!  I had made many a pie crust and similar items in my food processor.  And it so happened I had a mini food processor/chopper that I never used.  So I dug it out and gave the recipe a whirl, so to speak.  I followed everything in Lisa's instructions, with the exception of the extruder.  Instead, I sprayed the processor bowl and blade with some Cool Slip and broke the piece of clay into small bits and ran it through the food processor until the bits balled up together.  And then I broke it up into pieces and ran it through again.  I'm not sure how many times I did this, but at least 10 times.  Then I wrapped the clay up and let it rest overnight.

The next day the clay was a joy to work with.  It had a very creamy feel and didn't seem to dry out quickly at all.  I made a test slab, two cards thick, and a ring mini-mosaic ring.  The base of the ring was three cards thick with little mosaic pieces (two cards thick) attached with slip.  The ring sanded wonderfully, but it broke.  I think this was less the fault of the clay and more a matter of me squeezing a bit too hard on the ring.  It broke cleanly, though, and I repaired it with slip.

I fired it according to Lisa's directions, which is a two-part firing.  I didn't let the piece cool much after the second firing because I was too excited to see how it came out.  So I dug it out of the carbon with my long-handled tweezers and quenched it.  It looked much like fine silver PMC does right out of the kiln, but it was grayer in color.  It brass brushed well.  I tumbled the ring for about an hour and the photos show the result.  I have not yet patinaed it.  I have tried to pull the ring apart to test the joins I made when it broke.  I can't get it to pull apart with my fingers.


The test piece bent well and didn't crack or break, unlike the PMC Pro I used earlier, which was very brittle and easy to break (and I followed the firing directions to a T).


I am very happy with the results.  I didn't measure the ring pre-firing.  I made it very big, keeping in mind that Lisa's article says the shrinkage on rings varies widely.  It shrunk about five sizes, I would estimate, judging from the mandrel I formed it on (which is larger than any ring sizer I have).  I have always worried about rings and their durability in PMC.  Now I can make them in sterling.  Other than rings and cuffs, I would probably stick to regular PMC because it does take quite a while to make the clay.

Thank you so much to Lisa Cain for the hard work she put into this recipe and all the testing.  Her directions are very clear and easy to follow and it's thanks to her that the ring came out so well!


Tuesday, September 6, 2011

Haystack Wrapup


Wow!  The summer has gone by in a flash and so did my week at Haystack.  Even Hurricane Irene, which ended up being mostly just wind in that part of the state, couldn't keep me away.  Unfortunately, some people did get held up due to the hurricane.

This year we had a wonderful teacher, Patrik Kusek, and our TA was Lisa Cain.  I have admired their work for years and it was like meeting a couple of rock stars for me!   Patrik's teaching style was such that I immediately felt comfortable.  Our focus was to be on our artistic voice, which is a challenge for me, not having come from an artistic background.  We did several exercises to bring out our artistic voice and help foster creativity.  It made me feel much better when Patrik said that he didn't used to consider himself artistic and when I found out Lisa creates many of her pieces without first drawing them out, as I often do.

We learned a lot of dry construction techniques, and even with those I have used before I found new and easier ways to work.  We also used found objects, something I do very little of.  I tried to push myself to do things differently than I normally would and the pieces I made are a bit different than my usual work, I think.


We worked on shadow boxes to practice dry construction techniques and as a way to showcase things important to us.  This piece is called "Haystack 2011".  The texture on the front is carved into the dry clay and is meant to look like the wood boards that are used on the interior of all the buildings at Haystack.  The "window" is the shape of the buildings.  The back is made with a texture that I thought looked like rough waves.  I thought that was appropriate considering we arrived during Hurricane Irene (which really wasn't much in that neck of the woods - just a lot of wind).  In the window, I embedded a tiny piece of green sea glass I found on the beach the morning after the hurricane.


We also made rings - something in which I need practice.  My first ring is also my favorite piece of the bunch.  Patrik showed us a mosaic ring he made out of many different bits of textured clay.  This is my version of it, set with a very large cubic zirconia.  I love this technique and I think I will do more.


The other ring I made is called "Trash and Treasure" and was inspired by another walk on the beach.  I was picking up bits of broken shell, sea glass and other things I thought were pretty when it crossed my mind that those things I considered "treasures" were or had been trash to someone else.  If you enlarge the picture you will see have embedded sea glass, tiny shells and bits of sea urchin shell in resin.  On the bottom are bits of a piece of partially burned newspaper that I found in the woods on the same walk.


I also made a pair of earrings with the same theme.  


Continuing with the found objects theme, I decided to use a piece of mica given to me by one of my classmates to encase a luna moth wing I found earlier this summer and have been keeping in my flower press ever since.


This piece is large - nearly three inches across.  It looks simple, but a lot of work went into the shape and size of the frame, as well as the consideration of the best way to showcase the wing.  The mica was split in half with a layer under the wing and a layer over, sandwiched in between the frame and the backing and then all layers were riveted together.  It holds the wing nicely and the mica gives it a sort of sepia look.

Haystack is such a beautiful place.  I don't think anyone could go there and not be creative.  I hope I stretched my artistic wings a bit.  I know I will use many of the brainstorming techniques I learned from Patrik!  We also made a mobile with words to describe our artistic vision.  I will keep mine right on my work table to remind me of Haystack and the themes I want to keep in my pieces. 

One more year until the next class!

Friday, August 5, 2011

Customers' Favorite

Make a Wish Brooch

Earlier this summer, I submitted two brooches to Alone Moose Gallery in Bar Harbor.  It was a part of their "36 Brooches by 36 Artists" exhibit to celebrate their 36th year of business.  I was glad to have the chance to make a couple of brooches because I don't make them very often.

A couple of weeks ago, I got a call from Sherry Rasmussen, the owner of the gallery, that my "Make a Wish" brooch had won "Customers' Favorite".  I didn't know that the exhibit also included customers voting on their favorite, so I was pleasantly surprised to hear I had won.  And my piece sold as well!

Detail of Dandelion

 This is the first time one of my pieces has won anything.  It's very exciting and flattering, especially since there were several artists in the exhibit whose work I admire.
 
Back of Brooch


The dandelion and puffs are raised and have a sort of rough feel to them.  I used resin and embossing powders to get the puffy sort of look I wanted.

I originally thought that the piece that won was the other brooch I submitted, called "Fiddlehead".  It is a reversible brooch with my fiddlehead design on one side and a curly stylized tree on the other.  It is still on display at the gallery.

Front of Fiddlehead Brooch

Friday, July 22, 2011

Metal Clay Artist Magazine

Last summer I spent a week at Haystack Mountain School of Crafts.  It was a wonderful week working with PMC with no limits or restrictions.  One of the pieces that came out of that workshop, which explored hidden objects and containers, was my first "Peekaboo Pendant".  I wear it nearly every day and it's still one of my most favorite pieces. 


I've made others and they are always very popular.  Last winter I taught a workshop in making them and my students made some gorgeous versions.  I would have to say that, except for my Willow pendants, the Peekaboo Pendant has been my most popular design.


 I have never submitted photos of my work to any publication before, but took the leap a while back and sent a few photos to Metal Clay Artist Magazine.  Within a very short period of time, I received an email from the editor about my Peekaboo Pendant, wanting a one sentence description as she thought she might use it in their next issue.  I excitedly held my breath, but tried not to get my hopes up too much that it would actually be used. 

Last week I got my copy of the magazine - a special second anniversary issue - and quickly turned to the gallery section.  There is was, right beside some really fantastic pieces by artists whose work I have admired! 


Wegener's Update

Every so often I get comments on my blog or emails about my entries about my struggle with Wegener's Granulomatosis.  I don't write about it very often because, truthfully, I don't like to think about it too much.  By that I mean that I don't want it to be the be-all and end-all of my existence.  Yes, I'm a person with an autoimmune disease, but I don't want that to be my entire identity.  It's always there, but it's only a small part of me.  If I focus on it too much then I tend to become consumed with it, which, for me, is counterproductive.  This is not to say that I don't take the disease seriously.  I do.  But I can't let it take over my life.

Having said that, I do feel I owe it to those who have read my Wegener's entries to give updates every so often.  It's still there and requires me to ration my energy.  I can pretty much do everything I always did, except I sleep more, or I pay for it.  Sometimes it takes me a bit longer to recover from a big event (such as a weekend craft show).  I do have trouble remembering to get my bloodwork done every other month, though.  As long as I take my medicine the arthritis part of the disease (which is the symptom that affects my life the most) is manageable.  I do have flares every so often and I have learned to work through them with extra pain meds, hot baths and rest.  (Massages also help.)  When things do get bad during a flare, I have gotten pretty good about asking for help from my family and friends. 

Having a rare disease such as Wegener's can be lonely at times.  Those who don't have it can't relate to some of the issues that come up.  However, in this technological age, there are so many online groups that have other Wegener's sufferers who are always happy to give advice or a kind word.  I personally don't know anyone else who has Wegener's, except for those I've met online, but I have received a lot of support from a couple of people I know who have Rheumatoid Arthritis.  It's not the same thing, but they have similar symptoms with their joints and are on the same medications.  I suppose in some ways all autoimmune diseases are the same.

So what I would like to say to anyone who reads this and is having problems is:  keep your chin up.  It does get better.  Maybe not back to the way you were before Wegener's, but it will be a new normal that isn't so bad most of the time.  And thank you all for your comments and emails.  They mean a lot to me and I hope my (infrequent) posts about Wegener's help.

Tuesday, July 5, 2011

Arts in the Park this Weekend


I'm in top gear getting a bunch of new pieces ready for Arts in the Park this weekend (July 9 and 10).  It's an awesome show on the waterfront in Belfast.  Come see me and all the talented artists from 10:00 a.m. to 4:00 p.m.  Here's a sneak preview of some of the things I will have there.

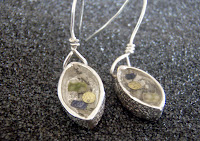
I got the enameling bug and these earrings are some of the results.


Below is a closeup of one of a pair of earrings I have been working on for quite a while.  They are enameled with the plique-á-jour technique, in which the enamel is wet packed into cells in the metal with no backing so the light can shine through.   This was my first attempt and is my take on a lupine.


I also will have several new bronze pieces, as well as many in silver.


Next week I will start my stint at the Bangor Outdoor Market.  It is a fun market in downtown Bangor on Thursdays from 5:00 to 8:00 p.m.  There is live music every week.  It's really worth checking out.

Tuesday, June 14, 2011

I've moved!

Not far,though!

I always knew my little studio/teaching space was temporary, and now it's officially someone else's (well, I still have a few more things to clean up).  So I've moved downstairs in my husband's office. The good news is there will be more room for classes and I have access to a larger, better sink.  (Those of you who have taken my classes know that I hated using the little bathroom sink.)

I will still be teaching and at my studio with the same schedule as always, which is on my calendar.  You can now find my studio at:

130 Oak Street, Suite 1
(ground floor - on the State Street side of the building)
(With Herrick & Salsbury, Inc.)
Ellsworth, Maine

Sunday, June 12, 2011

Right in My Own Backyard

I usually write something about my business or jewelry making for my blog, but I had such a wonderful experience yesterday and I really would like to share some pictures.

My husband and I went kayaking on the Union River which runs practically right behind our house.  We have been wanting to do this for a few weeks, but the tide schedule and our personal schedules have not cooperated until yesterday.  We put in a the Ellsworth "harbor".  I put that in parenthesis because it's not so much a harbor as a dock and a little boat ramp.   Ellsworth's not a very big town but the landing is on a fairly well traveled road and there was lots of traffic.  But once we put our kayaks in and got out into the river, it was so much different. 

We see lots of different birds in that area, including hawks and bald eagles, many times while sitting on the bridge waiting in traffic.   I saw a huge bird land in a tree, but it didn't have a white head, so I paddled over to get a closer look.  I took a bunch of pictures and after enlarging them on my computer, I confirmed what I had hoped on the river:  It was a juvenile bald eagle.  It was pretty ragged looking, so it might have been molting.  He wasn't too happy with us watching him and eventually flew away.

We also saw so many seals, I lost count.  I have a lot of pictures of water where the seals were before the went back under the water, but I did get a couple of them watching us.  They are quiet and you never know where they are going to pop up. 


Unfortunately, I didn't get a picture of the three seals swimming quickly upstream, jumping in and out of the water, like dolphins do (I'm sure there is a word for that, but I don't know what it is).  They were so close that I actually got splashed.

Further downstream there were no more seals, but it was so quiet and peaceful, you wouldn't know that you were right in the middle of a town, except for seeing the occasional house and the one person mowing their lawn.  I didn't get to see any otters, as I hoped I might, but we did see a peregrine falcon high up in a tree.
There were also two loons chasing each other in what Steve thought was probably some sort of mating ritual.  They were too fast for me to get a picture.

I was blessed and honored to see these beautiful animals, especially so close to humans.  It's amazing what you can see right in your own back yard.

Tuesday, June 7, 2011

Custom Pieces

I've got stuff all over the place and in every stage of completion, as well as a bunch of pieces that were finished ages ago, but I haven't yet listed.  Well, today is the day I took pictures of a bunch and will be listing them in my Etsy Shop over the next few days.  There are also some that won't make it to my shop because they are custom orders, but I still want to share those.

I was very pleased and honored to be asked to make earrings for a bride to wear in her wedding in July.  She wanted a certain color stone and I couldn't match it exactly.  She and her mom saw me enameling and decided to use a color I happened to be enameling with, which was a perfect match.  I rounded up the enameling so that it would look like a cabochon.


I have also made a couple of brooches for a shop in Bar Harbor that is doing a special brooch exhibit.  Both are made with texture sheets, using my own drawings.  The first is called "Make a Wish".  The fuzzies on the dandelion are slightly raised and secured with resin.


The second is a reversible pin.  The dangle part has a swirly tree design on one side and a stylized fiddlehead on the other.  That part can be removed and turned over to hang on the pin portion.  I suppose it could also be worn on a chain.


I used a jewelry lacquer to seal the patina for the first time on this piece.  I've been afraid to because every other thing I tried ended up changing the color of the patina.  This one didn't, though.  I didn't spray it, but actually sprayed a pool of the lacquer onto a piece of plastic and "painted" it into the depression where the lacquer is.

If you would like to see more photos of the two pins, you can see those here.

Wednesday, June 1, 2011

Higher Grounds Artisan & Vintage Market

I know summer has started when I announce my first show of the year.  I'm looking forward to this one, which sounds like a lot of fun.

Higher Grounds Artisan & Vintage Market
Sunday, June 19th
10:00 am to 3:00 pm
119 Water Street, Hallowell


Hope to see you there!

Thursday, April 28, 2011

Serendipity and More Adventures in Bronze and Copper Clay

My last experiment combining copper and bronze clay didn't go very well, but I tried again and this time I had success!  And I learned some things along the way. 

First, I'll share a piece that's just bronze clay.  When I take them out of the kiln, they have some fire scale and are a pinkish color.  I have been polishing them with my flex shaft and some 3M Radial Disks.  I decided to leave a bit of the pinkish color in the texture on this piece.

These pieces are to be earrings for myself.  I wanted to make something that had all three metals I've been using, so I used one of my favorite textures (a shell with worm holes in it) and cut circles of the same size.  I wanted to show the difference in shrinkage of the clays.  It's kind of hard to see here, but the copper is considerably smaller.  BronzClay only shrinks about 10 percent while CopprClay shrinks 15 to 20 percent.  I had misread and thought they both shrunk only 10 percent, which may have been part of the problem in my last firing.


This piece is all bronze, but it I wanted to show what happened to it.  I had it sitting on top of the plaid flower pendant I showed in my last post and it picked up a cool orangy patina.  I decided to polish off the dragonfly and leave the rest.  The picture doesn't show that there are some blues in the patina, too.  I will apply a lacquer to preserve this patina.


Here is another version of the dragonfly pendant, which is made with a mold I got at Cool Tools.  Here is my first bronze/copper combination.  I filled the dragonfly depressions in the mold with copper and let it dry.  It took a while to clean up around the dragonfly so there was no other copper in the mold.  I then pressed in a thick slab of copper clay and let that dry.  It came out pretty good, I think, except for a couple of cracks in the wings.  You can see the difference in the colors fairly well in this photo. 

This next set is to be a necklace, bracelet and earrings.  It's hard to see the color difference, but it's there.  Here I made bronze pieces with this design that is vaguely Japanese to me.  I let those dry and then pressed them into thick slabs of copper clay and cut out frames.  When I made these, I still thought that copper and bronze shrunk at the same rate.  Another bit of serendipity here:  The copper shrunk more, but instead of cracking, it domed the pieces, something that's a bit hard to see here.
 

I had some bits of both clays left and decided to see what would happen if I combined them.  I made a flat piece of each, put one on top of the other, rolled them up, sliced the rolls and rolled out the pieces.  It gave the clay a Mokume Gane kind of look.  It worked and does show up on the fired pieces, except not as much as I would have liked, so I patinaed them with Baldwin's Patina, so the copper shows up a bit more.  I will try this technique again now that I know a bit more about it and that it works.  One of the keys is not to mix the clays too much or you lose the marbling.


Lastly, I will leave you with a photo of the necklace I made with the flower and plaid piece that I turned green with Baldwin's Patina.  I was lucky to find these frosted glass beads that matched perfectly.